Your Cart is Empty
Holiday Gift Sale! Shop Now > |Free USA Shipping On Orders Over $75!
Holiday Gift Sale! Shop Now > |Free USA Shipping On Orders Over $75!

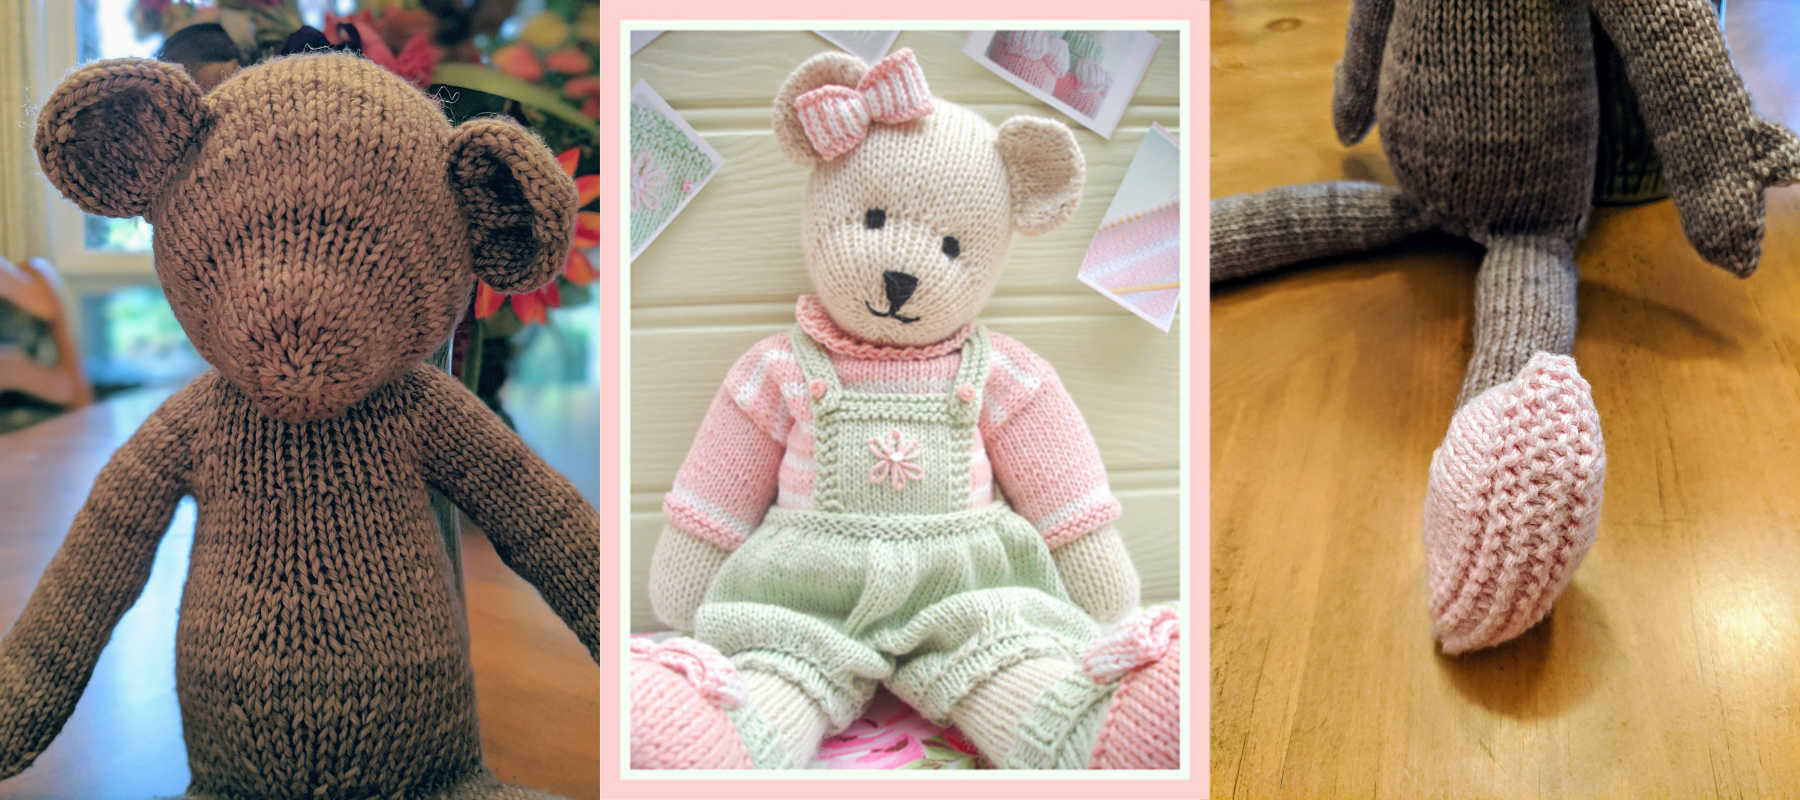
Kelley has almost finished her darling version of Susan Hickson's Candy Bear. She featured it on two episodes of Technique Tuesday, and it is the cutest! Her new grand baby, Claire, is one lucky little girl to be getting all of Kelley's special handknit goodies.
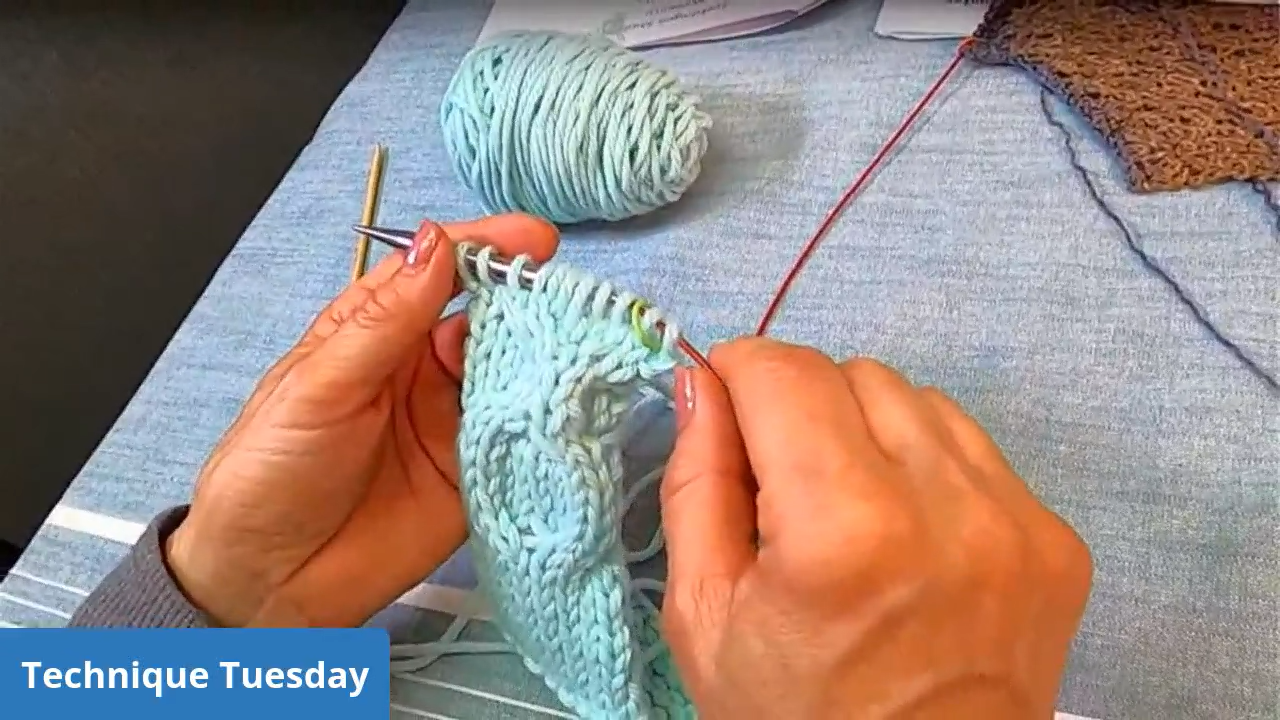
This week on Technique Tuesday, Kelley demonstrated picking up stitches to attach the bear's head to her body. She used this method instead of seaming the head to the body.
Picking up stitches is a great technique to use instead of seaming, and I love Kelley's tip for using tapestry needles to mark the stitches to be picked up.
Along with picking up stitches for the body, Kelley made a lot of other changes to her pattern, mainly to lessen the amount of seaming involved.
C/O using Judy’s magic cast-on, cast on 4 sts and increase every round (on each edge) until there are 12 sts on your needles. Now follow the pattern with the row with 12 sts on it. You're knitting in the round, so you won't need to purl.

C/O 5 sts and join in the round.
Rnd 1: Knit.
Rnd 2: KFB across the round.
Repeat Rnds 1-2 twice (40 sts). Now follow the pattern starting with 41sts. Purl rounds are now knit rounds.

Knit 10 rounds of 19 sts.
Increase to 23 sts by doing the following.
Needle 1 (front): Knit across. Needle 2 (back): K3, (K1, M1) X 4, K3. Follow the pattern from here.
I also added a thumb, by doing a thumb gusset and then finishing the thumb in the round, just like you would knit a thumb on a mitten or glove.

Cast on 44 sts using Judy’s Magic cast-on. Flip needles over so that the purl bumps are showing. Knit 1 rnd. Purl 1 rnd. Repeat twice more (bottom of foot has garter ridges). Count these as part of your 15 rows of stockinette st in pattern. Follow pattern, using K8 instead of K9 as written. Continue to follow pattern except leave live sts on scrap yarn so that you can Kitchener it together with the bear body later.

In order to make my bear able to sit up, I added four sets of German Short-Rows to its bottom. This adds a little pouch of fabric to the rump, which can be filled with stuffing and make a cute little bottom. If you wanted to add a little weight to the bear to make it really stable when it sits, you could stuff this area with some weighted stuffing material, such as Poly-Pellets.

We hope these modifications make your Candy Bear a little easier and quicker to knit!
Cheers,


Comments will be approved before showing up.

Do you feel lost when it comes to picking out your first knit sweater pattern? This week, Kelley shared her favorite sweater patterns during Technique Tuesday. These patterns all feature minimal seaming, have detailed instructions, and have lots of completed projects on Ravelry!
Kelley has knit the Brick Sweater several times, and has decided to knit it again with all our Technique Tuesday viewers! Grab some worsted weight yarn and join us for this informal knit along.