Your Cart is Empty
Summer Sale! Shop Now > |Free USA Shipping On Orders Over $75!

Make-one (M1) increases are so common in knitting patterns, but when a designer calls for an M1R (make-one right) or an M1L (make-one left), what exactly does that mean, and why is there a difference?
Well, these two decreases lean different ways after they're worked, and when used together, they make a nice-looking design element, as shown below:

For both of these increases, you lift the "bar" of yarn between two stitches, place it on the left needle, and knit into either the front or back of the bar, so that it twists. If you knit into the stitch normally, you would be left with a hole in your knitting.
The difference in the stitches is how you place the bar on your knitting.
In the M1R increase, insert the right needle from back to front under the bar and place it on the left needle. Then knit into the front loop of the bar, twisting it to the right. Hence, make-one right!
Here's Kelley to show you how to work an M1R (she calls the bar a "running thread"):
Note how, after the bar is lifted onto the left-hand needle, Kelley loosens it a little with her right-hand needle. This little tug makes it so much easier to insert the left needle into the front loop of the bar.
For the M1L increase, insert the right needle from front to back under the bar and place it on the left needle. Knit into the back loop of the bar, twisting it to the left. Hence, make-one left!
Here's Kelley again, to demo the M1L increase (she calls the bar a "running thread"):
After the bar is on the needles, note how Kelley is sliding her right needle into the front of the bar and over the left needle to place the right needle in the correct position (through the back loop) to knit the stitch. This makes the M1L much easier to knit, because this increase can be difficult if you try to put it through the back loop as you would normally.
TIP: One way to remember how to work the two stitches is that your needle points to the right when you're knitting the bar in the M1R increase, and your needle points to the left when you're knitting the bar in the M1L decrease. Pretty slick, huh?
Many times, a pattern doesn't specify direction, and just says M1. In these cases, look at the pattern, and use the make-one increase that makes sense for how the increase section is going to grow.
Increases at the Beginning/End of a Row
For example, I always use M1L if my increases are coming at the beginning of a row, because the stitches are going to slant to the left of the increase. Similarly, I use M1R at the end of a row, because the stitches are going to slant to the right of the increase.
If I'm working on a sleeve, the increase row may look like this:
K2, M1, K to last 2 stitches in row, M1, K2.
I use an M1L for the first increase and an M1R for the second increase; here's what that looks like:

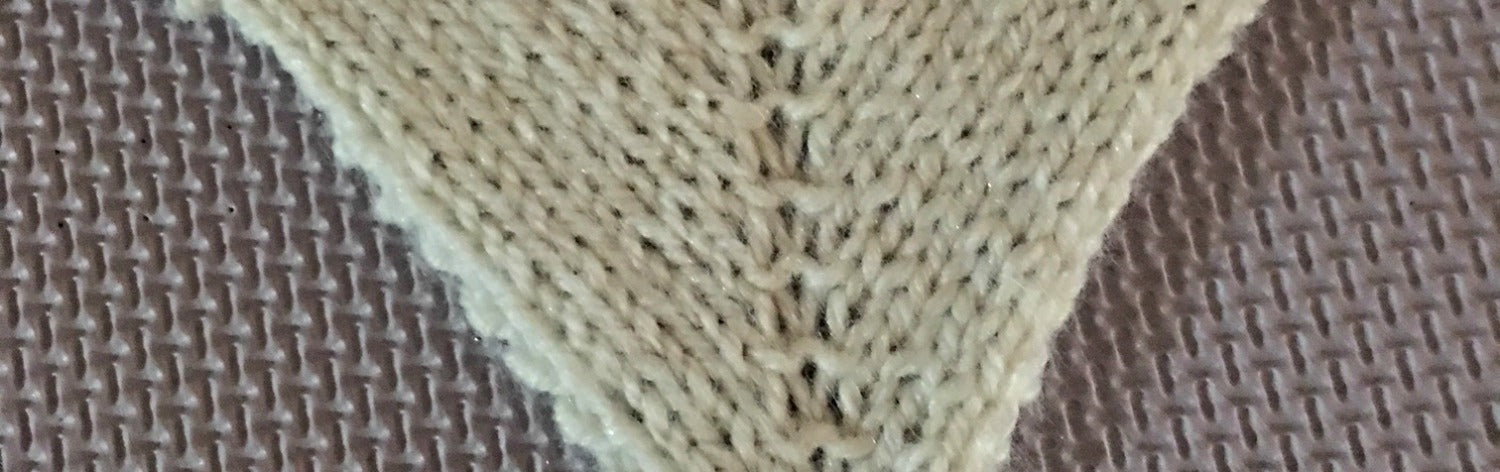
Increases Before and After Markers
In the example in the photo above, the stitches precede and follow a marker, which is marking off a center stitch. In this case, I used M1R for the first increase, because the stitches will slant to the right, and M1L for the second increase, since the stitches will slant to the left. You can see how this makes a nice pattern.
In the long run ...
As long as you're consistent, it really doesn't matter which increase you use in which position. The stitches will still grow in the direction that's intended, and your project will turn out beautifully.
Many people do choose to use M1L when a pattern doesn't specify a right or left direction, because the M1L is a little easier to work than the M1R. And this is JUST FINE! I am one of those perfectionist knitters, though, I'll admit it, so I slant the decreases to the right or left.
I hope this helps you when knitting make-one increases!
Cheers,

P.S. How do you work your make-one increases? Leave a comment and let me know!

Comments will be approved before showing up.


