
How to Follow Stitch Repeats in Patterns

If you can track one stitch group and one row group, you can follow most repeats in a pattern.
When I read stitch repeats, I focus on 3 things first: the symbol that starts the repeat, the number of times it repeats, and the stitch count at the end. That alone helps me catch mistakes early and keep rows in order. In many patterns, one repeat works across a row, while another works up the fabric over 2, 4, or more rows.
Here’s the short version:
- Horizontal repeats go across a row or round
- Vertical repeats go over several rows or rounds
-
*usually marks where a repeat starts -
[]and()usually group stitches - Stitch counts at row end help me check my work
- Ring markers help track repeats on the needle
- Locking markers, row counters, and lifelines help track repeat rows
- RS means right side; WS means wrong side
A simple example: if a pattern says [K2, P2] 5 times, I work a 4-stitch unit five times for 20 stitches total. If it says repeat Rows 1–4 five times, I know I’ll work 20 rows.
| What I check | What it tells me |
|---|---|
* |
Where the repeat begins |
[] or ()
|
Which stitches stay together |
| End stitch count | Whether I stayed on track |
| RS / WS | Which side of the work I’m on |
| Marker type | Whether I’m tracking stitches or rows |
The main idea is simple: I break the pattern into small parts, mark each repeat, and confirm counts as I go.
How to Use Stitch Markers For Knitting and Crochet
How to Read Repeat Markers in Written Patterns
U.S. knitting and crochet patterns use punctuation marks to show what to repeat and where that repeat stops. The marks you'll see most often are asterisks, brackets, and parentheses.
How Asterisks Mark the Start of a Repeat
An asterisk (*) shows where a repeat begins. After that, the pattern tells you how far to go, like *[k2tog](https://www.alpacadirect.com/blogs/alpaca-direct-blog/k2tog-knit-2-together-1-minute-knitting-tutorial), yo; rep from * to end or rep from * to last 4 sts.
The key is simple: start at the asterisk and follow the instruction from that point. Then repeat it for as long as the pattern says. Brackets and parentheses do a similar job, but instead of just marking the start, they group the stitches inside the repeat.
How Brackets and Parentheses Group Stitches and Repeat Counts
Brackets [ ] and parentheses ( ) group stitches that should be repeated a set number of times. For example, [k2, p2] 5 times tells you exactly which stitches belong in that repeat.
Parentheses can also do a couple of other jobs. They may group a row repeat, as in repeat rows (1–5) 8 times, or show the total stitch count at the end of a row, like (24 sts).
Longer patterns often mix these symbols together. That's usually the point where nested repeats show up.
How to Read Nested Repeats Without Losing Your Place
Nested repeats can look a little messy at first glance, but they're easier to read if you slow down. Read the outer instruction first, then work through the inner repeat exactly as written.
It also helps to use stitch markers to divide each repeat block, so you can see where one section ends and the next begins. If the line still feels crowded, break it into smaller chunks and work through them one at a time.
How to Follow Stitch Repeats Row by Row
Track Repeats Across a Row or Round Using Stitch Counts and Markers
Once you know what the repeat symbols mean, the next step is staying on track while you knit. A simple way to do that is to place a stitch marker after each pattern repeat. That breaks the row into smaller sections, which makes the pattern much easier to follow.
Instead of trying to manage a long string of stitches all at once, you can check your work one repeat at a time. Put a marker after each repeat so you can spot your place at a glance. If you're knitting in the round, use a different color or shape for the Start of Round marker and standard rings for the repeats inside the round. That way, you can tell them apart fast.
Track Repeat Rows With Row Counters, Notes, and Lifelines
If a repeat runs across several rows, stitch counts alone won't save you. You also need a clear way to track which row you're on. That's where row counters, notes, and lifelines come in.
A handy trick is to use a removable stitch marker instead of tally marks to track finished repeats. Place it directly in the fabric at the end of each repeat. You can also use a locking marker to mark each completed repeat. It sounds small, but it helps a lot when you stop mid-project and come back later.
How to Use Charts and RS or WS Labels Correctly
When a repeat covers more than one row, RS and WS labels help you stay on the right side of the work. RS means right side. WS means wrong side.
Mark the repeat intervals on the chart, then match those same sections on your needles. Think of it like using a map and street signs at the same time. For trickier repeats, row counters and lifelines give you a backup record in case you lose your place.
Tools and Resources That Help You Follow Repeats
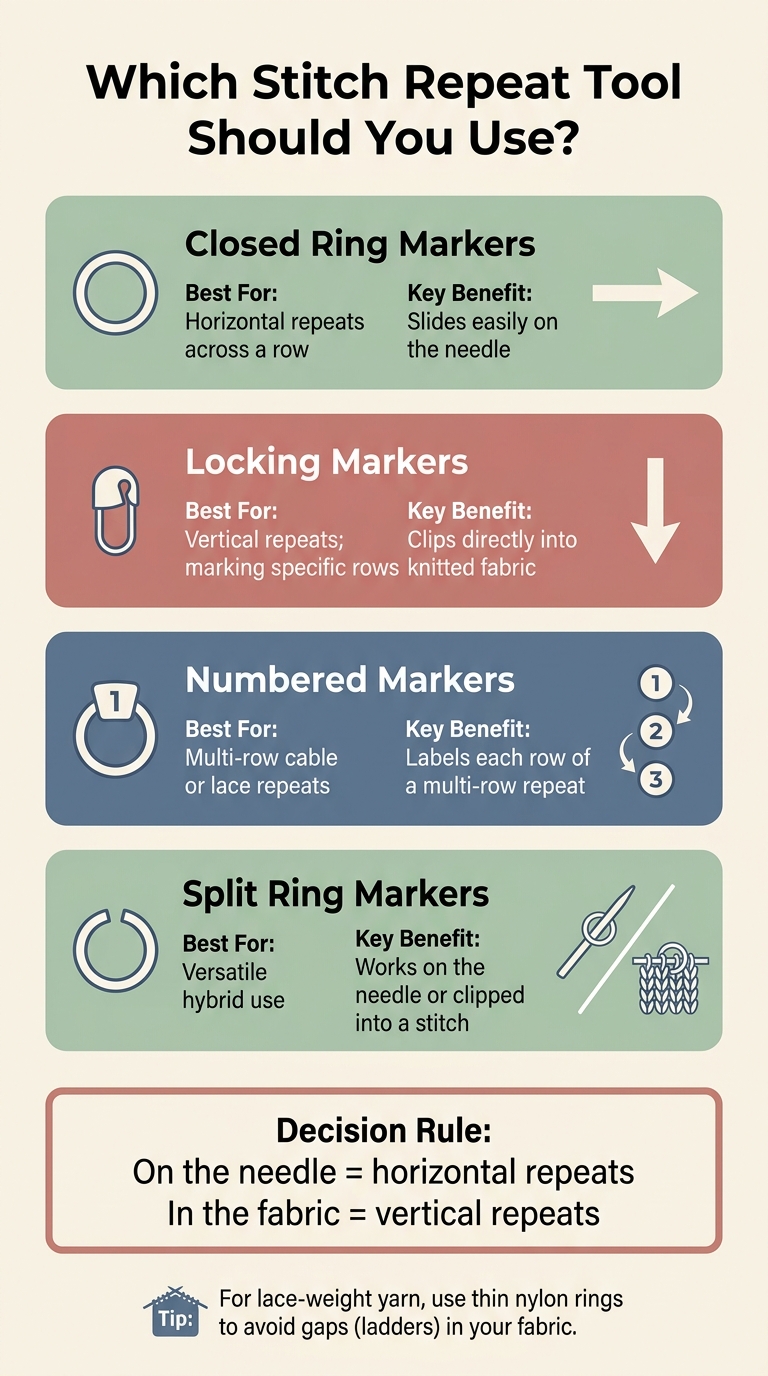
Knitting Stitch Repeat Tools: Which Marker to Use & When
Basic Tools for Tracking Repeats
Once you can read repeat symbols, the next move is simple: use tools that help you keep your place.
A good rule of thumb is to match the marker to the kind of repeat you're following. Put markers on the needle for horizontal repeats across a row. Put markers in the fabric for vertical repeats that run over several rows.
| Tool | Best For | Key Benefit |
|---|---|---|
| Closed Ring Markers | Horizontal repeats across a row | Slides easily on the needle |
| Locking Markers | Vertical repeats; marking specific rows | Clips directly into knitted fabric |
| Numbered Markers | Multi-row cable or lace repeats | Labels each row of a multi-row repeat |
| Split Ring Markers | Versatile hybrid use | Works on the needle or clipped into a stitch |
Pick the marker that fits the repeat type, then stick with that setup through the project. That bit of consistency can save you from second-guessing yourself halfway through a row.
For lace-weight yarn, thin nylon rings are a better fit. Bulkier markers can leave small gaps, or ladders, in the fabric.
Alpaca Direct Tutorials and Project Support
If you learn best by seeing it done, short demos can make repeat tracking click much faster.
The Alpaca Direct YouTube channel shows how stitch markers can help you track repeats in actual projects. And if you want more help, Alpaca Direct’s blog and Learning section include free resources for working through more difficult repeats.
Conclusion: Key Steps for Following Repeats With Confidence
Now that you know how repeat symbols and row tracking work, use this checklist before you start. Following stitch repeats comes down to three simple habits.
Before you cast on, make sure your stitch count divides evenly into the repeat.
Read repeat symbols exactly as written. * marks the start of a repeat, and [] or () show stitches worked together a set number of times. For example, [K2, P2] 5 times means work that 4-stitch unit five times.
It also helps to separate two kinds of repeats. One repeats across a row or round. The other repeats over several rows. If Rows 1–4 are repeated five times, that gives you 20 total rows, so a row counter or locking marker can help you keep your place.
Check your stitch count at the end of each repeat section, and use markers and row tracking to stay accurate. Those small checks - stitch counts, markers, and row tracking - make the whole process feel much more predictable.
FAQs
How do I know where a repeat ends?
Use stitch markers to split up each repeat as you work. If you place a marker after every repeat, you get a clear visual and hands-on cue that shows where one repeat ends and the next begins.
In patterns that use asterisks, brackets, or parentheses, those symbols show which stitches or steps are part of the repeat. Different colored markers can also help you tell pattern repeats apart from the start of a round.
What should I do if my stitch count is off?
First, check whether your total stitch count matches the pattern repeat. If it doesn’t, adjust the total up or down until it does. Or go with a pattern that fits your current count, like a simple k1, p1 rib.
For small mistakes, duplicate stitch can help fix alignment without tearing everything back. And to avoid the same headache later, place stitch markers between repeats. It makes skipped or extra stitches much easier to catch.
Do I need markers for every repeat?
No. You don’t need a marker for every repeat, but it can help a lot on more complex projects.
If you place a stitch marker after each repeat in lace, colorwork, or cable patterns, it’s much easier to keep your place. You can spot mistakes faster and avoid counting over and over.
That said, some knitters keep it simple and use markers only at the start of a round or section.