Your Cart is Empty



A double knitting chart is simpler than it looks: 1 square = 2 stitches, and you read each square as front first, back second. If you remember that, plus row direction, you can avoid most chart mistakes from the start.
Here’s the short version:
That means you only need to keep track of 4 main rules. And in most double knitting charts, 100% of the squares affect both sides of the fabric, not just one.
One more thing: I’d treat chart shading as a role guide, not a yarn-color command. So if your yarn is red and gray instead of the printed light and dark shades, the chart still works the same way.
If I wanted the whole article in one plain idea, it would be this: read each square as a two-stitch instruction, then follow the row in the right direction.
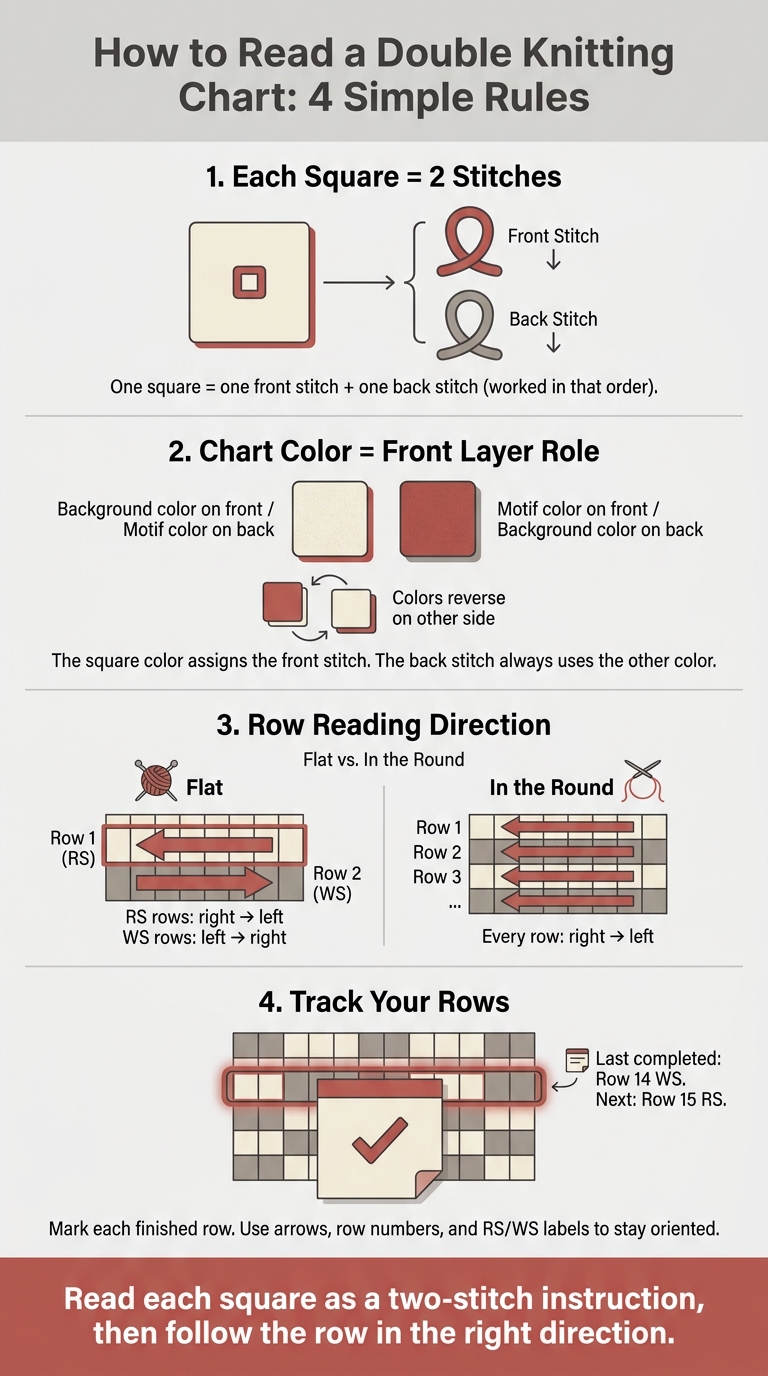
How to Read a Double Knitting Chart: 4 Simple Rules
Now that you know the chart shows both sides at the same time, each square should be read as a stitch pair.
That means one square stands for:
When the right side is facing you, knit the front stitch first, then work the back stitch.
In a standard two-color double knitting chart, the color inside the square tells you what happens on the front layer. The back layer uses the other color.
So if a square shows your motif color, knit the front stitch in that color and purl the back stitch in the opposite color. It’s a handy built-in check: when you flip the fabric, the colors switch places, but the motif still reads the same.
Use this quick reference when a symbol appears in the chart.
| Chart Element | Front-Layer Stitch | Back-Layer Stitch |
|---|---|---|
| Light square | Knit in background color | Purl in the opposite color |
| Dark square | Knit in motif color | Purl in the opposite color |
| Solid border square | Knit in border color | Purl in border color |
Some charts use same-color border squares, which means both layers use that same color. You’ll often see this at selvedge edges or in solid stripe sections.
Start with the legend, then apply the same front-then-back logic to each square. Some designers also use split diagonal squares or letter symbols to show front and back colors more directly, especially in patterns with more than two colors.
Once you can decode each square, the next step is reading the row direction the right way.
Every double knitting chart is read from the bottom up. As your fabric grows, you move upward through the chart. Start with the bottom row, which is Row 1.
When you knit flat, you read RS rows from right to left and WS rows from left to right. That back-and-forth shift matches the way flat knitting works.
Odd-numbered RS rows have their numbers on the right edge of the chart. Even-numbered WS rows have their numbers on the left edge. Some charts also include small arrows, like → or ←, next to the row numbers to make the direction clearer.
Use the row number and arrow to spot your starting edge, then work across the row.
When you knit in the round, read every row from right to left. You don't turn the work, so the direction stays the same all the way through. That means there's no back-and-forth shift to keep track of.
If the row numbers appear on one side of the chart - usually the right - the chart is often meant for knitting in the round. That steady reading direction also makes it easier to line up symbols with front- and back-yarn positions.
Once you know which way to read the chart, the next step is simple: connect the chart to what your hands do with the yarn. That’s where chart reading turns into yarn handling.
Start with the legend, then turn each square into a front-and-back stitch pair. Don’t read a square as one stitch by itself. Read it as a two-part instruction.
Follow the legend closely: one symbol tells you the front stitch, and the other tells you the back stitch.
If your yarn colors don’t match the printed chart colors, don’t let that throw you off. Think of the chart shading as front/back roles, not exact colors. A quick note on the legend can save you a lot of second-guessing. For example:
"light square = front red/back gray,"
That little reminder helps you keep going without stopping to work it out again.
Once you know what each square means, keep your yarn placement the same as you knit. Pick one yarn to stay in front and one to stay in back. Then, from square to square, only the stitch assignment changes, not your yarn setup.
Keep that same front yarn and that same back yarn for every pair. It makes long rows much easier to track. Row markers and arrows can also help you hold that order when the chart starts to stretch out.
Once you can read the row direction, the next step is staying on the right row. That sounds basic, but it's where a lot of knitters get tripped up. Before you start each row, check the row number, the arrow, and the RS/WS label so you know exactly where you are.
Simple tools can make a big difference, especially on long charts. A sticky note, magnetic board, or ruler can cover rows you've already finished and keep your eye on the current line.
"Always use stitch markers to differentiate the right side of your work as well as repeats." - Alpaca Direct
It also helps to mark each row the moment you finish it. A pencil tick, a check mark, or a diagonal line through the row number all do the job. If you stop in the middle of a session, leave yourself a clear note, like this: "Last completed: Row 14 WS, next: Row 15 RS."
When your place is marked, the chart feels a lot less messy and much easier to follow row by row.
Everything in this guide comes back to four simple rules:
For more help, Alpaca Direct shares knitting tutorials, project ideas, and step-by-step video demos on its website and YouTube channel. You can watch experienced knitters work through chart reading and double-knitting techniques in real time.
In double knitting, each chart square stands for two stitches: one in your Main Color (MC) and one in your Contrast Color (CC).
Here’s how it works:
The back will show a mirrored color negative, so plan for that color swap before you start. It helps to use high-contrast colors and yarns with matching weights so the motif stays clear.
If you lose your place in a double knitting chart, cross off each row as you finish it and use stitch markers between repeats so everything stays lined up. A row counter or lifeline can help too.
If you get stuck, compare the stitches on your needles with the chart row below to work out where you are. For visual help, see the Alpaca Direct YouTube channel.
Check the row direction indicators. For flat knitting, read odd rows from right to left and even rows from left to right.
For knitting in the round, read every round from right to left.
If you want a visual walk-through, Alpaca Direct’s YouTube channel also offers demonstrations and technical support for these techniques.

Comments will be approved before showing up.










