Your Cart is Empty
Summer Sale! Shop Now > |Free USA Shipping On Orders Over $75!

Count me among the few proud yarnies who love finishing work. I know! It's not the norm among our tribe, is it? Well, I've learned from experience that careful finishing takes knits from good to great, and I want my knits to be great!
Blocking is the last step in knitting a project, and it's where you can literally wash away problems. There are three types of blocking most normally used—wet blocking, steam blocking, and spray blocking—and I'm going to describe all three for you.
This is my favorite way to block, and I think it produces the best results for anything knit from wool (or just anything, really). In this method, the entire piece is immersed in water, with a little squirt of your favorite wool wash. It's important to let the garment soak until it's entirely saturated with water.

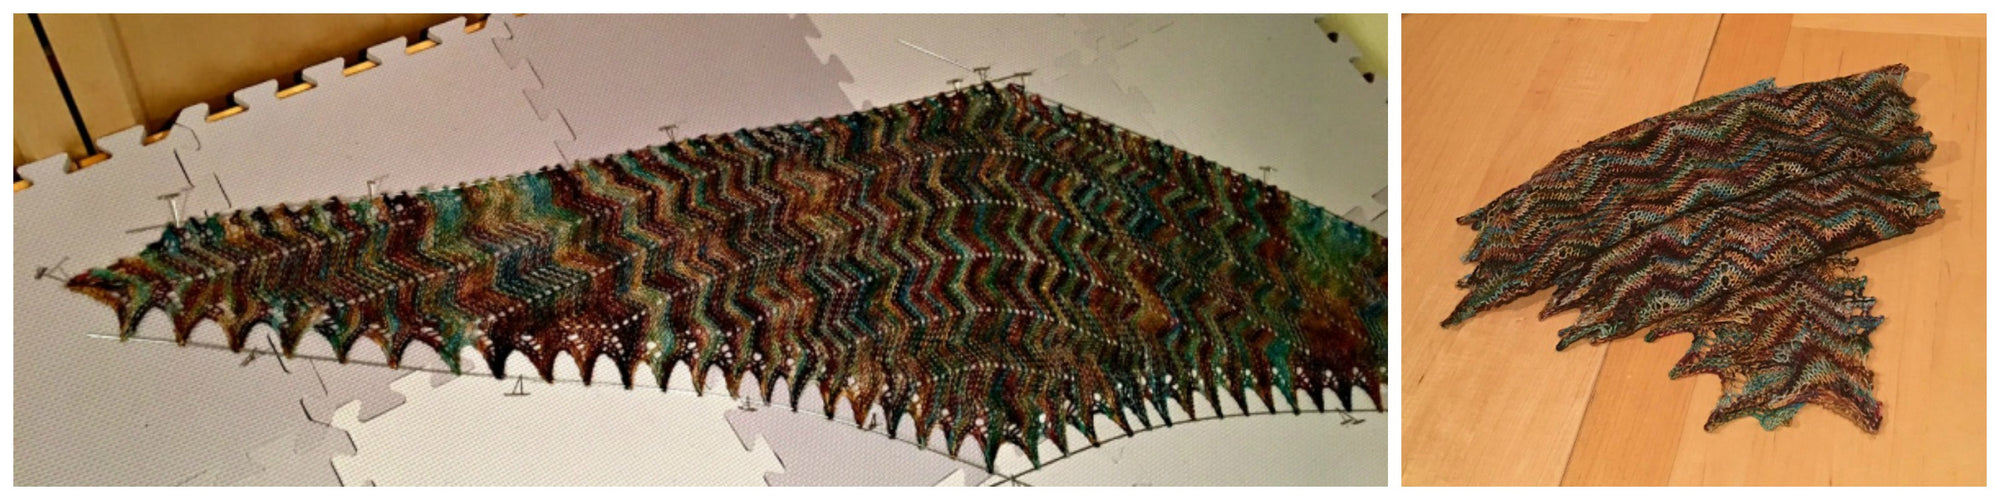
Here is my Lori Shawl (by Carrie Bositck Hoge) having its bath.
I gently squeeze the piece to work the water into the garment, without wringing it at all, and leave it in the sink for about 20 minutes or more. Once the garment is saturated, I remove it from the water, roll it in clean towels, and step on it (you read that right) to get out as much water as possible.
Then I lay it out on my blocking mat, using my hands to gently spread out the garment. Now it's time to pin. This step can take a lot of time or a little, depending on the project. Here are two projects; the first took no time to pin out, and the second was a little more complex, although the blocking wires helped immensely.

Easy pinning job: The Lori Shawl by Carrie Bostick Hoge

More complex pinning: The Vittorio Shaw by Corrina Ferguson
Note that the shawl is threaded onto blocking wires and the points are pinned aggressively. This is crucial in a shawl with points on the edging. The points are such a beautiful design element, you want to be able to see them. When the shawl is taken off the blocking wires, the points will look beautiful. Check it out:

This also goes for anything with a lace design. Pin the project out aggressively so the lace pattern shows up in all its beauty.
Pinning Basics
Be sure to use rust-proof pins; you don't want to stain your project with rust spots. The horror!
Use the garment schematic and a tape measure to pin out your garment to the appropriate measurements. This is where you can gain a couple inches here and there, if needed—natural fibers are really pliable when damp. (If your garment is basically the size you want it, be careful not to stretch it when pinning. Just use a light hand to smooth out the lumps and bumps.)
After your piece is satisfactorily pinned, use your hands to gently smooth out any wrinkles or bumps, and let dry!
One product I HIGHLY recommend is Knitter's Pride Knit Blockers (shown in the top project above, and in the baseball jacket below). These handy tools have 8-pin blockers and 4-pin blockers, and they really speed up the process. I have two sets, which is enough to pin out a sweater, with a little assistance from blocking wires and a few T-pins.
Follow the pinning process noted above (but no soaking). Once the pieces are pinned to your blocking surface, use a steamer or a steam iron to apply steam.
If you use an iron, NO NOT touch the iron to the surface of the garment; you could ruin your knitting! Hold the iron a couple of inches above the pieces and press the steam button to apply the steam. If you have a steamer, you may be able to place the handle directly on the garment. I can do this with my steamer, but please follow the manufacture's instructions for your steamer.
When you've steamed enough, you'll see the fabric of your garment relax slightly. Watch carefully. And please use caution—the steam is HOT.
I'm finishing up Debbie Bliss' Baseball Jacket, and I steam-blocked the pieces before seaming them.
 Top: The almost seamed sweater. I'm still working on the collar. Middle: The back and one of the fronts. Bottom: The sleeves—they look huge, but that's the nature of raglan sleeves.
It's simply amazing what a difference blocking makes. The following picture shows two identical front pieces, one pinned and steamed, one not. Pretty amazing, right?

The wonders of blocking: Two cardigan fronts, one pinned out,
the other patiently waiting!
When steam-blocking your pieces, wait at least three hours before unpinning your pieces, making sure they're completely dry first. I usually let them sit overnight before unpinning.
This process is similar to steam blocking, but you wet the pieces with a spray bottle. After pinning, lightly spritz each piece and then gently smooth it out with your hands. Spray a little more if you feel the pieces aren't relaxing into shape.
My opinion is that the spray-blocking method is the least effective. I always end up under- or over-saturating my garment. But spray-blocking may work great for you!
Washcloths, maybe? I block everything. It's the finishing touch that knitted (and crocheted!) items need to come into their glory.
Blocking makes the yarn bloom—the fibers "plump up" and the stitches fill in—and it smooths out the stitches, making them look more even. This is what I meant at the beginning of this post when I said blocking can wash away problems. That bumpy section of short-rows, for example, will smooth out and practically disappear!
Here's a video where Kelley covers blocking and how to keep straight edges on your projects during her weekly Technique Tuesday Facebook live show.
If you're not a blocker, I hope these before and after pictures and blocking instructions will inspire you to try it. You'll be amazed at the difference in your finished projects.
Cheers,


Comments will be approved before showing up.


Barbara Germain
September 21, 2018
Thank you for sharing info. Happy to receive .