Lose the "donkey ears" on your knit socks! We all love our gorgeous sock yarn, and we want our sock knitting patterns to look great. Here's a better way to graft the toe of a knitted sock, which results in a smooth finish.

graft a sock

A better way to graft the toe of a knit sock

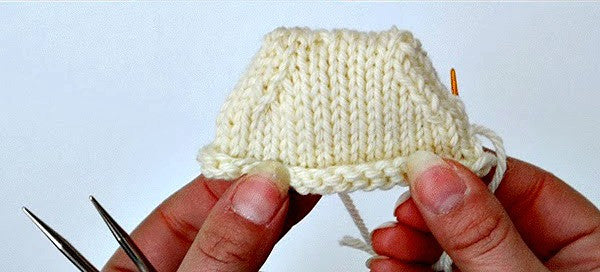
Step 1: Work your sock to the toe, stopping just before grafting the toe stitches together.

Step 2: You should have the same number of stitches on both needles.

Step 3: Before you start grafting you need to work the setup. Thread the tail of your yarn through a tapestry needle and insert the threaded tapestry needle into the first stitch on the needle closest to you as if to purl and pull it through, leaving the stitch on the needle.

Step 4: Then insert the needle into the first stitch on the back needle as if to knit, leaving the stitch on the needle. Pull the yarn through.

Step 5: Now insert your tapestry needle into the first stitch as if to knit, slipping the stitch off the needle.

Step 6: Repeat with the second stitch, insert the tapestry needle into the second stitch as if to knit and slip off the needle, as if you were doing a ssk.

Step 7: Then insert the needle onto the next (3rd) stitch as if to purl, leaving the stitch on the needle. Pull the yarn through. You have now grafted two stitches off the front side.

Step 8: Insert the tapestry needle through the first two stitches on the back needle as if to purl, slipping both stitches off the needle.

Step 9: Insert tapestry needle as if to knit on the next (3rd) stitch, leaving the stitch on the needle.


 Pull yarn through. You have now grafted two stitches from the back needle. 


Continue grafting as normal. Remember on the front needle: knit off, purl on, and on the back needle: purl off, knit on.


Continue grafting until you have 2 stitches on the front and back needles. (4 sts total)


Step 10: Insert the tapestry needle through the last 2 stitches on the front needle as if to knit.


Step 11: Pull stitches off the needle and pull the yarn through.


Step 12: Insert tapestry needle through last 2 stitches as if to purl.


Step 13: Pull off the needle and pull tight.


Step 14: Pull the end through to the inside of the sock and weave in your end! This technique is also great for the tops of mittens. Decreasing in grafting can also be helpful if you have an uneven number of stitches to graft.

Want to learn more? 

Here's one of my weekly live videos I did on how to use the Kitchener Stitch for this technique: 


Now grab some sock yarn and cast on!

Save

Kelley Hobart
Kelley Hobart


12 Responses

LindaV
LindaV

April 16, 2017

I’ve been using this tutorial for a while now and I just love the technique. It makes so much sense, and produces a great result. Thank you for taking the time to share it!

Gayle Schultz
Gayle Schultz

October 05, 2016

I don’t understand “Repeat with the second stitch, as if you were doing a ssk.” Do you draw the yarn into the 2 stitches from behind, as in a ssk? The decreases are at different places on each end. What if you have a 2 X 2 rib to kitchener, can you decrease each purl stitch, so the knits appears continuous?

Mari Luke
Mari Luke

October 05, 2016

Gayle,
When it says “repeat with the second stitch, as if you were doing a ssk” is referring to how you insert the needle into the second stitch. You insert the needle into the second stitch from the front, as if to knit, so you are slipping two stitches knit-wise off the needle, as if you were working an ssk. The decreases shown in this example are both at the edges of the toe, so that the first two and last two stitches of either end and either side are decreased into one.

As for the second part of your comment grafting in pattern is slightly different. That’s a great idea for a future blog post!

Gayle Schultz
Gayle Schultz

October 05, 2016

I have my sock in front of me, still not able to do this. After the 2 set ups, it’s not making sense how it starts out on the back needle as if to knit, then saying to ‘Repeat with the second stitch, as if you were doing a ssk’, then it says you have purl into the next (3rd) stitch, (BUT are you on the front stitches now??) and then ‘You have now grafted two stitches off the front side’, but it didn’t say to do anything to the front, as I’m still in back doing the ‘as if it was ssk’. Please help!

Mari Luke
Mari Luke

October 05, 2016

Gayle,
I’m sorry to hear you’re having a hard time! You work the as if to knit on the front needle. The yarn will be coming from the back needle. If you’ve never grafted before it might be helpful to first look for a tutorial on the basics of grafting, since this post assumes that you are already familiar with the grafting technique.
Good luck!

Gayle Schultz
Gayle Schultz

October 05, 2016

I was following your directions, and it never said to switch to the front needle. And yes, I’ve grafted before. If you are going to mesh 2 different things, then you should do the proper steps, including, ‘on the front needle, etc. etc’, instead of assuming I know what you are thinking. The ssk still doesn’t seem possible, and perhaps shouldn’t be mentioned, as it’s not an action you can take when sewing, because you aren’t using the knitting needle to graft with the sewing needle

Mari Luke
Mari Luke

October 05, 2016

Gayle,

Another way to think about it is that you are grafting as normal, but on the first stitch of either side you’re working two stitches instead of one, to avoid the pointing at the sides of the toe. It’s the most complicated with the first stitch on the right hand side because in order for the stitches to lean left you need to slip the two stitches knit-wise individually. Alternatively if you weren’t concerned with the direction of the decrease you could simply insert the tapestry needle into the first two stitches as if to knit, and that would also decrease a stitch while grafting. I’ve also added a sentence to Step 3 that will hopefully clarify the directions for you.

Sandra
Sandra

October 05, 2016

Thank you for this video. I had seen this before but could not remember where. For anyone that is having trouble understanding it, you may need to read through it a few times but it becomes clear with the reading and thinking through the steps.

Anita
Anita

October 05, 2016

Great instructions, shall try it on my next socks. Thank you.

Susan Wilson
Susan Wilson

October 05, 2016

a true ‘lightbulb’ moment. Thankyou sooooo much.

One Afterthought done (almost) | hafknits2

October 05, 2016

[…] bumpette at each end of Kitchener.  Otherwise great!  hmmm just found this which might help with “donkey […]

Anna
Anna

October 05, 2016

I love this technique. Thank you for sharing.

Leave a comment

Comments will be approved before showing up.


Also in Alpaca Direct Blog

Spring projects with Berroco Vintage DK yarn

by Kelley Hobart March 07, 2026 7 min read

Read More
Steam Blocking Alpaca Knits: Step-by-Step Guide

by Kelley Hobart February 18, 2026 9 min read

Read More
Alpaca vs. Organic Cotton: Best Eco Yarn Gifts

by Kelley Hobart February 17, 2026 12 min read

Read More